A pressure washer looks like the ultimate shortcut for dirty brickwork. Blast it clean in minutes, job done. But ask any experienced mason or building contractor and they'll tell you the same thing — used incorrectly, a pressure washer can do more damage to brickwork in 20 minutes than 20 years of weather.
The good news is that pressure washing brickwork is perfectly safe when you understand the rules. This guide covers everything: the right pressure settings, nozzle types, technique, when you should use a pressure washer and when you absolutely shouldn't — with practical examples for different brick types, climates, and budgets across India, the UAE, the UK, the USA, and Australia.
How Pressure Washing Damages Brick (When Done Wrong)
Understanding what can go wrong is the most important part of this guide, so let's start here.
Brick is porous. Water that enters under high pressure doesn't just sit on the surface — it penetrates into the body of the brick and into the mortar joints. When that water later expands and contracts with temperature changes, it causes:
- Spalling — the brick face flakes or chips off as trapped moisture expands. Very common in freeze-thaw climates like the UK, northern USA, and Canada.
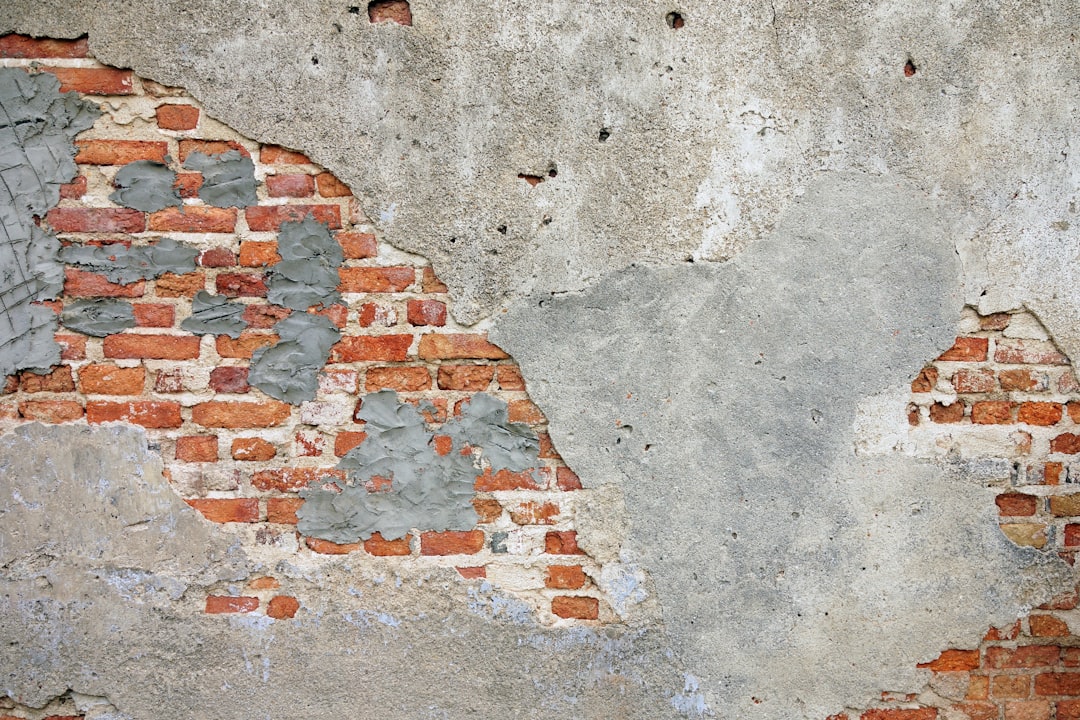
- Mortar joint erosion — high pressure physically blasts mortar out of the joints, weakening the structural integrity of the wall.
- Efflorescence acceleration — forcing water into the brick pushes salts further in, and when the wall dries, more white patches appear than before you started.
- Surface etching — very high pressure (above 2,500 PSI) can etch the actual brick face, changing its texture and appearance permanently.
None of this means pressure washing is inherently bad. It means you need to respect the tool.
The Right Pressure Settings for Brickwork
This is where most people go wrong — they set the pressure too high because they think more pressure equals faster cleaning. It doesn't. It just means more damage.
| Brick Type | Recommended Pressure (PSI) | Recommended Pressure (Bar) | Notes |
|---|---|---|---|
| Modern dense clay brick | 1,200–1,500 PSI | 83–103 bar | Safe range for most new construction |
| Fly ash / AAC blocks | 800–1,200 PSI | 55–83 bar | Softer, more porous — lower pressure is safer |
| Older handmade clay brick | 500–800 PSI | 35–55 bar | Pre-1950s bricks are soft — treat gently |
| Heritage or reclaimed brick | Avoid or 300–500 PSI max | 20–35 bar max | Consult a heritage mason before attempting |
| Brick paving / floors | 1,000–1,500 PSI | 69–103 bar | Wider angle nozzle, sweep motion |
For most home pressure washers available in India (brands like Bosch, Karcher AquaBlast, or locally branded units), the default setting is often 1,300–1,600 PSI — which is fine for modern brick walls if you maintain proper technique. In the UK and Australia, electric pressure washers in the 1,300–1,800 PSI range are standard for domestic use.
Pro Tip: When in doubt, go lower. A second pass at lower pressure does less damage than one pass at too-high pressure. You can always increase pressure slightly if needed, but you can't un-damage a brick face.
Choosing the Right Nozzle
Pressure washer nozzles are colour-coded by spray angle. The angle determines how much the water spreads — wider angle means more coverage but less concentrated force.
- Red nozzle (0°) — never use on brick. This is a pinpoint jet that will pit and etch brick immediately.
- Yellow nozzle (15°) — only for very tough concrete stains. Too aggressive for most brickwork.
- Green nozzle (25°) — the workhorse for brick cleaning. Good balance of pressure and coverage.
- White nozzle (40°) — best for older, softer, or more delicate brick. Gentler and safer.
- Black nozzle (65° soap) — for applying cleaning solution before the rinse pass.
For most brick walls — exterior walls, garden walls, boundary walls — start with the white 40° nozzle. If it's not shifting the grime, step up to the green 25° nozzle. Almost no residential brick job needs anything narrower than 25°.
Step-by-Step Technique for Pressure Washing Brick
Good technique matters as much as the right settings. Here's the correct process:
Step 1: Inspect the wall first
Walk the entire wall before you pick up the washer. Look for cracked or crumbling mortar joints, loose bricks, visible cracks, spalling, or areas of previous repair. If the mortar is already deteriorated, pressure washing will make it worse — get those areas repointed first.
Step 2: Protect the surroundings
Cover plants, window sills, electrical outlets, and any ground-level surfaces with plastic sheeting. Water will go everywhere, and if you're using a cleaning solution, it will damage plants and stain paving.
Step 3: Pre-wet the wall
Using the pressure washer on its lowest setting or a regular garden hose, wet the entire wall surface before you apply any cleaning solution. This is critical — pre-wetting prevents the cleaning solution from being absorbed too aggressively into dry brick.
Step 4: Apply cleaning solution if needed
For heavy grime, mould, or efflorescence, apply a brick-specific cleaning solution using the black soap nozzle. Let it dwell for 5–10 minutes — don't let it dry on the wall. Good brick cleaning products: Sure Klean 600 or Prosoco products (USA/UK), Davco Brick and Tile Cleaner (Australia), Pidilite Roff Brick Cleaner (India), or simply a diluted bleach solution for mould.
Step 5: Pressure wash — top to bottom
Always work from the top of the wall downward. Dirty water running down over clean sections you've already done wastes your effort. Keep the nozzle 30–45 cm from the wall surface. Use smooth, overlapping horizontal sweeps — don't hold the wand in one spot.
Angle the spray slightly downward (about 45°) so water shears off the surface rather than being forced directly into the brick face. This matters more than most people realise — straight-on spraying drives water straight into the mortar joints.
Step 6: Rinse thoroughly
After cleaning, do a final rinse pass with clean water to remove all traces of cleaning solution. Any residue will continue reacting with the brick and can cause streaking or further staining.
Step 7: Let it dry completely
Allow the wall to dry fully — at least 24–48 hours in warm weather, longer in cool or humid conditions — before applying any sealer or paint.
Pressure Washing Brick Driveways and Pathways
Brick pavers can handle slightly more pressure than wall brickwork, but the same principles apply. Use a rotary turbo nozzle or a surface cleaner attachment if you have one — these distribute pressure more evenly and clean faster without the streaking that wand nozzles can leave on flat surfaces.
For oil stains on driveways: apply a degreaser and let it soak for 15–20 minutes before pressure washing. Pressure alone won't shift embedded oil — you need to break the bond first.
For joint sand between pavers: pressure washing will remove it. You'll need to re-sand the joints with kiln-dried sand after cleaning and compaction. Budget for this when planning the job.
Pressure Washing New vs Old Brickwork
There's an important timing rule for new brickwork that many homeowners get wrong: never pressure wash new brickwork until the mortar has fully cured.
Mortar reaches initial hardness in 24–72 hours, but it continues curing for 28 days. Pressure washing during this period can weaken the mortar bond, wash uncured cement out of the joints, and leave the wall structurally compromised.
Wait at least 28 days after construction before pressure washing. For new fly ash brick walls, which can be slightly more porous than dense clay bricks, wait the full 28 days and use lower pressure.
For older brickwork, the concern is the opposite — older bricks are softer and their mortar may already be weakened by age. A building that was constructed before the 1960s should be assessed by a mason before you consider pressure washing. What looks like solid brickwork may have mortar joints that are barely holding together.
Pressure Washing Equipment: Hire vs Buy
For a one-off job, hiring is almost always the better financial decision. For regular use — large properties, driveways, commercial premises — buying makes sense.
| Country | Hire Cost (Per Day) | Entry-Level Buy | Mid-Range Buy |
|---|---|---|---|
| India | ₹800–₹2,000/day | ₹3,500–₹7,000 (Bosch/local brand) | ₹12,000–₹25,000 (Karcher) |
| UAE | AED 100–250/day | AED 200–500 | AED 600–1,500 |
| UK | £30–£70/day | £60–£150 (Nilfisk/Karcher) | £200–£500 |
| USA | $40–$100/day | $80–$200 (Sun Joe/Ryobi) | $250–$600 |
| Australia | A$50–120/day | A$100–A$250 (Ryobi/Gerni) | A$300–A$700 |
Professional Pressure Washing Services
If the job is large (full exterior of a house), involves height (two-storey or above), or the brickwork is in uncertain condition, hiring a professional is the right call. Professionals have commercial-grade equipment, experience reading brick condition, and often offer soft-wash options for delicate surfaces.
| Country | Professional Service Cost |
|---|---|
| India | ₹3,000–₹10,000 for a full exterior (standard home) |
| UAE | AED 400–1,000 for a villa exterior |
| UK | £150–£500 for a standard semi-detached house |
| USA | $200–$700 for a typical single-family home exterior |
| Australia | A$300–A$800 for a standard house exterior |
When NOT to Pressure Wash Brickwork
There are situations where pressure washing should be avoided entirely:
- Listed or heritage buildings — in the UK, unlicensed pressure washing of a Grade I or II listed building can result in legal penalties. Always use approved low-pressure or TORC steam methods.
- Walls with damaged mortar joints — crumbling or missing mortar must be repointed before any water cleaning.
- Painted brick — pressure washing will strip paint. If you want to repaint after cleaning, that's fine, but be prepared for the old paint to come off. Our guide on exterior wall paints by climate covers the repainting process.
- Before winter in freeze-thaw climates — pressure washing saturates brick with water. If temperatures drop below freezing before the wall dries, that water freezes and causes spalling. In the UK, northern USA, and Canada, avoid pressure washing in late autumn.
- Walls with visible cracks or structural movement — water ingress can accelerate structural problems. Get a structural assessment first.
After Pressure Washing: Sealing Your Brickwork
Pressure washing opens up the pores of brick and removes any existing surface protection. This makes the wall more vulnerable to water ingress immediately after cleaning — which is exactly why sealing matters.
Wait until the wall is completely dry (minimum 48 hours of dry weather) before applying a sealer. Use a breathable penetrating sealer — silane or siloxane-based — rather than a film-forming product. Breathable sealers allow moisture vapour to escape while preventing liquid water from entering. Film-forming sealers trap moisture and can cause the very spalling you're trying to prevent.
Good sealer brands: Thompsons WaterSeal or Ronseal Matt Finish (UK), RadonSeal or Prosoco AquaTreat (USA), Bondall Silasec (Australia), Sika SealCrete or Fosroc Nitocote (India/UAE).
For ongoing brickwork maintenance — understanding mortar joint condition, repointing, and how different brick types age — our comparison of brick masonry vs stone masonry covers the structural side in detail.