Dirty bricks can make even a well-built house look tired and neglected. Whether it's years of dust, white salt patches creeping across the surface, black mould hiding in the joints, or old mortar splatter left by careless workers — cleaning brick is one of the easiest ways to dramatically improve how a building looks. And the good news is, you don't always need to hire someone to do it.
This guide covers everything you need to know about cleaning brick walls, floors, fireplaces, and exteriors — with methods that work whether you're in a humid climate like Mumbai or Chennai, a dry desert environment like Dubai, a rainy country like the UK, or anywhere in between. We'll cover safe DIY methods, when to call a professional, and what mistakes to absolutely avoid.
Why Bricks Get Dirty (And Why It Matters)
Before you start scrubbing, it helps to understand what you're actually dealing with. Different types of staining need different treatments — using the wrong cleaner can permanently damage brick or make the problem worse.
The most common brick problems are:
- Efflorescence — those white powdery patches caused by water pulling salt minerals to the surface. Very common in new construction and in areas with seasonal rain cycles.
- Mould and algae — green or black growth, usually on shaded or damp walls. Especially common in the UK, Australia, and coastal India.
- Mortar smears — grey streaks left when bricklayers didn't clean up properly during construction.
- Soot and smoke stains — mostly on fireplaces and chimneys, but also on exterior walls near busy roads.
- Oil and paint stains — from accidental spills or old paint jobs.
- General grime and dust — the everyday accumulation of pollution, dirt, and organic matter.
What You'll Need Before You Start
Gather your supplies before you touch the wall. Here's what most cleaning jobs require:
- Stiff natural bristle brush or nylon brush (never a wire brush on softer bricks)
- Garden hose or pressure washer (low setting)
- Bucket and sponge
- Safety goggles and rubber gloves
- Old clothes — cleaning brick is messy work
- Cleaning agent appropriate for your stain type (details below)
- Drop cloth or plastic sheeting to protect plants and surfaces below
One important rule before you begin: always wet the brick wall thoroughly before applying any cleaning solution. Dry brick is porous and will soak up the cleaner unevenly, which can lead to blotchy results or even damage.
Method 1: Cleaning Everyday Dirt and Grime
For general surface dirt — the kind that builds up over a few years from pollution and weather — you don't need any harsh chemicals at all.
What to use: Warm water and a few drops of dish soap or liquid laundry detergent.
Steps:
- Pre-wet the entire wall with a garden hose. Let it soak for a minute.
- Mix warm water with a small amount of dish soap in a bucket.
- Scrub the wall in circular motions using a stiff brush. Work from top to bottom so dirty water doesn't run over clean sections.
- Rinse thoroughly with clean water. Make sure no soap residue remains — dried soap leaves its own stain.
- Let the wall dry completely before assessing whether a second pass is needed.
This method works well for interior brick walls, fireplaces (when not heavily sooty), and feature walls that just need a refresh. It's also the safest method for older, softer bricks.
Method 2: Removing Efflorescence (White Salt Deposits)
Efflorescence is one of the most common brick problems, and it looks alarming even though it's usually harmless. Those white crusty patches are just mineral salts — nothing structural is wrong with the wall.
For fresh efflorescence (less than a year old), dry brushing alone often works. Use a stiff dry brush to scrub the white patches off. The salts haven't fully crystallised yet, so they come away without much effort. Then rinse with water.
For older, stubborn efflorescence:
- Make a solution of 1 part white vinegar to 5 parts water.
- Apply to the affected area with a brush and let it sit for 5–10 minutes.
- Scrub firmly and rinse well.
For very heavy deposits, diluted muriatic acid (hydrochloric acid) is effective — but it requires serious caution. See the acid washing section below.
Pro Tip: After removing efflorescence, treat the wall with a silane or siloxane-based water repellent sealer. This stops water from penetrating the brick and carrying more salts to the surface. Products like Roff Tileguard or Sika SealCrete work well in India; in the UK, look for Thompsons WaterSeal; in Australia, Bondall Silasec is widely used.
Method 3: Removing Mould, Mildew, and Algae
Mould on brick is more than just ugly — it degrades mortar joints over time and can spread to interior walls if left unchecked. It thrives in damp, shaded spots, which is why you'll often find it on north-facing walls, basement walls, or walls near drain pipes.
Safe DIY solution: Mix 1 cup of bleach (sodium hypochlorite) into 1 gallon (approximately 4.5 litres) of water. Add a few drops of dish soap to help the solution cling to the surface.
- Pre-wet the wall.
- Apply the bleach solution with a brush and let it sit for 10–15 minutes. You'll see the mould start to die and lighten in colour.
- Scrub well and rinse thoroughly.
Cover nearby plants before you apply bleach solution — it will kill them. Rinse the ground around the base of the wall with plain water after you're done.
For organic growth on exterior walls, a commercial fungicidal wash is a longer-lasting option. Brands like Ronseal Mould Killer (UK), Wet & Forget (Australia, USA), or Fevikwik Sealant Spray (India) create a residual barrier that prevents regrowth for 1–2 years.
Method 4: Removing Old Mortar Splatter
Construction sites often leave mortar smears on new brickwork. If you catch them while the mortar is still fresh (within a few hours), a damp cloth or sponge will remove them easily. Once mortar dries and cures, it bonds strongly to the brick surface.
For cured mortar splatter:
- Try chipping away larger lumps carefully with a wooden chisel or plastic scraper. Never use metal tools on finished brick face — they scratch and leave marks.
- After removing the bulk, treat remaining traces with a diluted muriatic acid solution (see below) or a commercial mortar remover like Sure Klean 600 (widely available in the USA and UK).
Method 5: Acid Washing for Tough Stains
Muriatic acid (diluted hydrochloric acid) is the heavy artillery of brick cleaning. It dissolves mineral deposits, mortar residue, rust stains, and heavy efflorescence very effectively — but it can also damage brick if used incorrectly.
Safety first:
- Wear acid-resistant rubber gloves, safety goggles, and old clothing.
- Work in a ventilated area — fumes are irritating and harmful.
- Never mix acid with bleach. This produces toxic chlorine gas.
Correct dilution for brick cleaning: 1 part muriatic acid to 10 parts water. Always add acid to water — never the reverse.
- Pre-wet the wall thoroughly. This is critical — acid hitting dry brick causes uneven etching.
- Apply the diluted solution with a natural bristle brush. Work in small sections.
- Let it sit for no more than 5 minutes. You'll see fizzing as it reacts with mineral deposits.
- Scrub and rinse immediately with large amounts of water.
- Neutralise remaining acid with a baking soda and water solution (1 cup per gallon), applied to the wall and rinsed off.
Never use acid on limestone, natural stone, or calcium silicate bricks — it will dissolve them. Always test on a small hidden patch first.
Method 6: Cleaning Fireplace Brick
Fireplace brick collects soot, creosote, and smoke residue over years of use. The cleaning method depends on how heavy the buildup is.
For light soot: Mix 3 tablespoons of dish soap with 1 tablespoon of table salt and enough water to make a loose paste. Apply to sooty brick, let sit for 10 minutes, then scrub and wipe away with a damp cloth.
For heavy soot and creosote: Use a commercial fireplace cleaner. Rutland Fireplace Cleaner is widely used in the USA. In the UK, Stovax makes dedicated chimney and fireback cleaners. Dry ash from the fireplace itself can also be rubbed into soot stains with a damp sponge — it acts as a mild abrasive and is surprisingly effective.
Never use a pressure washer inside a fireplace. Water saturation can damage the firebox and mortar joints, causing cracking when the fire is lit again.
Pressure Washing: When It Helps and When It Hurts
A pressure washer is tempting — it looks like it would blast away years of grime in minutes. And it can, if used correctly. The key is pressure setting. Use no more than 1,000–1,500 PSI for standard clay or fly ash brick. Higher pressure strips mortar from joints, damages the brick face, and drives water deep into the wall.
Use a wide fan nozzle (25° or 40°), keep the wand at least 30 cm from the wall, and spray at a slight downward angle. Avoid pressure washing on older bricks (pre-1950s), walls with damaged mortar, or bricks with visible cracks or spalling.
For a deeper dive on brick material properties — which affects how your bricks respond to water pressure — see our comparison of fly ash bricks vs red bricks.
Cleaning Brick Floors and Pathways
Brick pavers and floors pick up grease, moss, and foot traffic staining differently from walls. A few additional tips for floors:
- For moss and algae on outdoor paving: Apply a patio cleaner or diluted bleach, leave 20–30 minutes, scrub with a stiff deck brush and rinse.
- For grease stains (driveways, workshops): Apply cat litter or sawdust to absorb fresh grease first. For set-in grease, a degreaser like Simple Green (USA, Australia) or Faber Deterdek (India, Europe) works well before scrubbing.
- For indoor brick floors: Use a pH-neutral stone and tile cleaner. These floors often have a sealer that acid or bleach will strip.
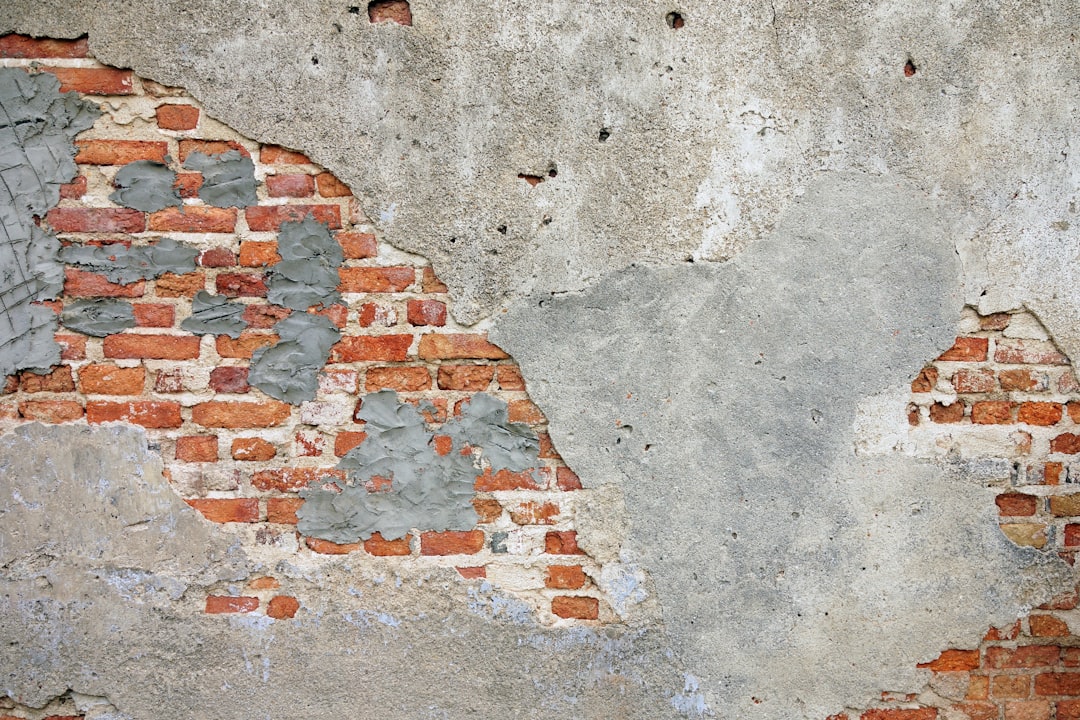
Cleaning New Brick After Construction
New brickwork almost always needs cleaning once construction is done. This is sometimes called a "builders clean" and usually happens before handover to the owner.
The standard approach:
- Allow mortar to fully cure — minimum 7 days, ideally 28 days.
- Dry brush the entire wall to remove loose dust and mortar crumbs.
- Pre-wet the wall.
- Apply diluted muriatic acid (1:10) in sections, scrub, and rinse thoroughly.
- Apply a water repellent sealer once fully dry.
For more on brick types used in new construction, see our detailed guide on hollow bricks — sizes, weight, and construction use.
Cleaning Costs by Country
| Country | DIY Cost (Materials) | Professional Clean (per m²) | Full Exterior Wash Service |
|---|---|---|---|
| India | ₹300–₹800 | ₹40–₹120/m² | ₹2,000–₹6,000 |
| UAE | AED 50–150 | AED 15–40/m² | AED 300–800 |
| UK | £15–£50 | £3–£8/m² | £150–£500 |
| USA | $20–$60 | $3–$7/m² | $200–$600 |
| Australia | A$25–A$70 | A$4–A$10/m² | A$250–A$700 |
When to Call a Professional
DIY brick cleaning works well for most residential jobs, but there are situations where a professional is worth it:
- Large-scale exterior cleaning of a multi-storey building (safety risk)
- Heritage or listed buildings where the wrong method could cause permanent damage
- Severe mould that has penetrated through to the interior of the wall
- Chemical staining from industrial or commercial sources
- Mortar joints showing crumbling or cracking — a mason should assess before you add water
Professional brick cleaners use hot water pressure washing, chemical cleaning, or TORC/Doff low-pressure steam systems for heritage work. The TORC system is particularly common for historic buildings in the UK and Europe — gentle enough for centuries-old brick but still highly effective.
Common Mistakes to Avoid
- Using undiluted acid — always dilute properly (1:10 at minimum).
- Skipping the pre-wet — dry brick soaks up cleaner unevenly and results are patchy.
- Using wire brushes — they leave metal particles that rust and stain the brick.
- Cleaning in direct sunlight — solution dries before it can work. Clean in shade or on an overcast day.
- Not rinsing thoroughly — leftover cleaner, especially bleach or acid, continues reacting with the brick and damages it over time.
- Painting over dirty brick — if you plan to paint after cleaning, make sure the wall is completely clean and bone dry. Our guide on best exterior wall paints by climate covers what prep work is needed before you apply any paint.
After Cleaning: Protect Your Brickwork
Once your brick is clean, it makes sense to protect it so you don't have to repeat the work every year.
A penetrating silane or siloxane sealer is the best long-term protection for exterior brick. It soaks into the pores and creates a water-repellent barrier without changing the appearance of the brick or stopping it from breathing — which matters, because brick walls need to release moisture vapour. Film-forming sealers can trap moisture and cause spalling over time.
Apply sealer only when the wall is completely dry — ideally 48 hours after cleaning in warm weather, longer in damp conditions. One coat is usually enough.
Regular maintenance is simpler than you think. A quick rinse with a garden hose once or twice a year stops grime from building up. Check mortar joints every 2–3 years — if they're crumbling or cracking, get them repointed before water gets in and causes much bigger problems. For understanding how brickwork behaves under load and moisture, our comparison of brick masonry vs stone masonry is a useful read.